
Testimonial videos are a powerful tool for showcasing positive feedback and building credibility for your business. CapCut, a popular free online video editing tool, provides an easy and efficient way to create captivating testimonial videos. In this step-by-step guide, we will walk you through the process of creating testimonial videos using CapCut.
Step 1: Sign Up for CapCutfree online video editor
Go to your browser and search “CapCut,” then sign up.
Step 2: Collect Testimonials and Footage
Reach out to satisfied customers and request permission to feature their testimonials in a video. Request them to provide written testimonials along with any relevant footage or images they may have. Collect a variety of visuals that showcase your customers’ experiences and the impact your business has had on them.
Step 3: Start a New Project
Open the CapCut app on your mobile device. Tap on the “+” icon to start a new project. Choose the appropriate aspect ratio for your video (e.g., 16:9 for YouTube) and select the desired resolution.
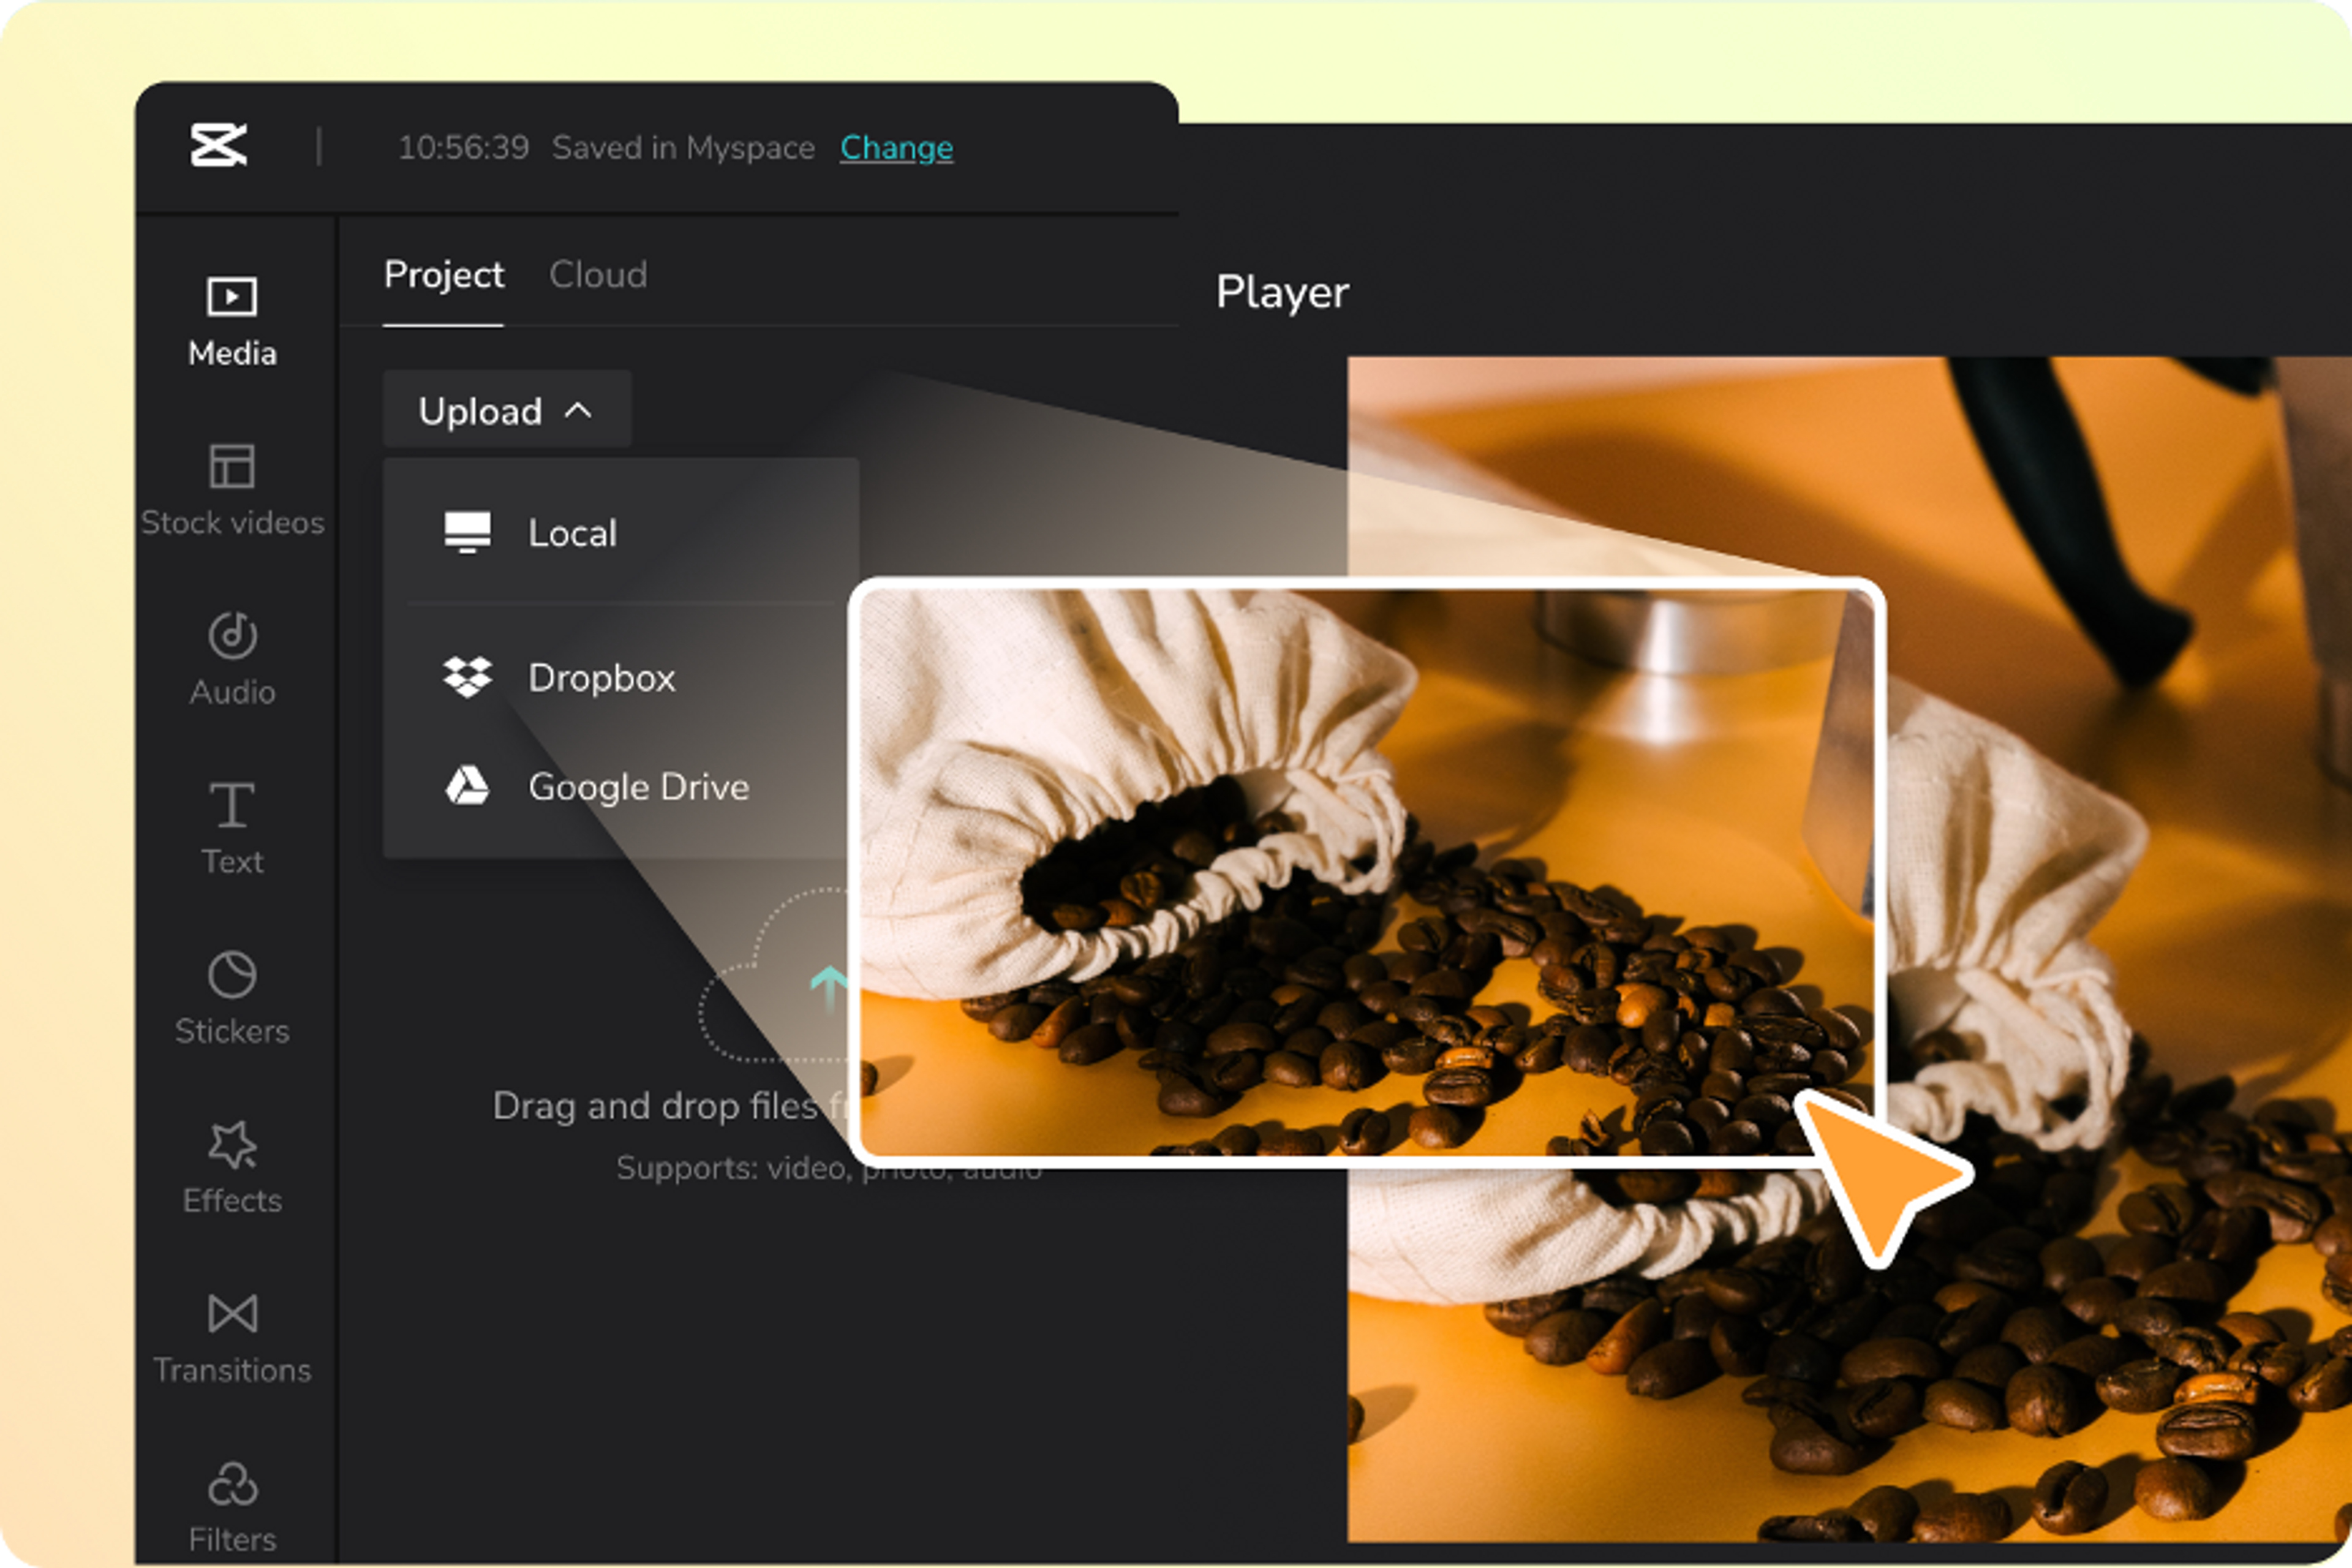
Step 4: Import Testimonial Footage
Tap on the “Media” button at the bottom of the screen to import the testimonial footage and images you collected. Browse through your device’s gallery and select the files you want to include.
Step 5: Arrange and Trim Clips
Drag and drop the imported clips onto the timeline at the bottom of the screen. Rearrange them in the desired order to create a smooth and coherent narrative. Trim the clips to remove any unwanted sections or ensure they fit within the desired duration. CapCut provides easy-to-use tools for trimming and adjusting the duration of your clips.
Step 6: Add Transitions and Effects
Enhance the visual appeal of your testimonial video by adding transitions between clips. CapCut offers a wide range of transition effects you can apply by tapping the “Transition” button. Experiment with different transitions to find the ones that suit your video’s style.
Step 7: Include Text and Captions
Tap on the “Text” button to add text overlays and captions to your testimonial video. Use text to highlight key points, display quotes from testimonials, or provide context for the footage. CapCut offers various fonts, colors, and styles to customize the appearance of your text.
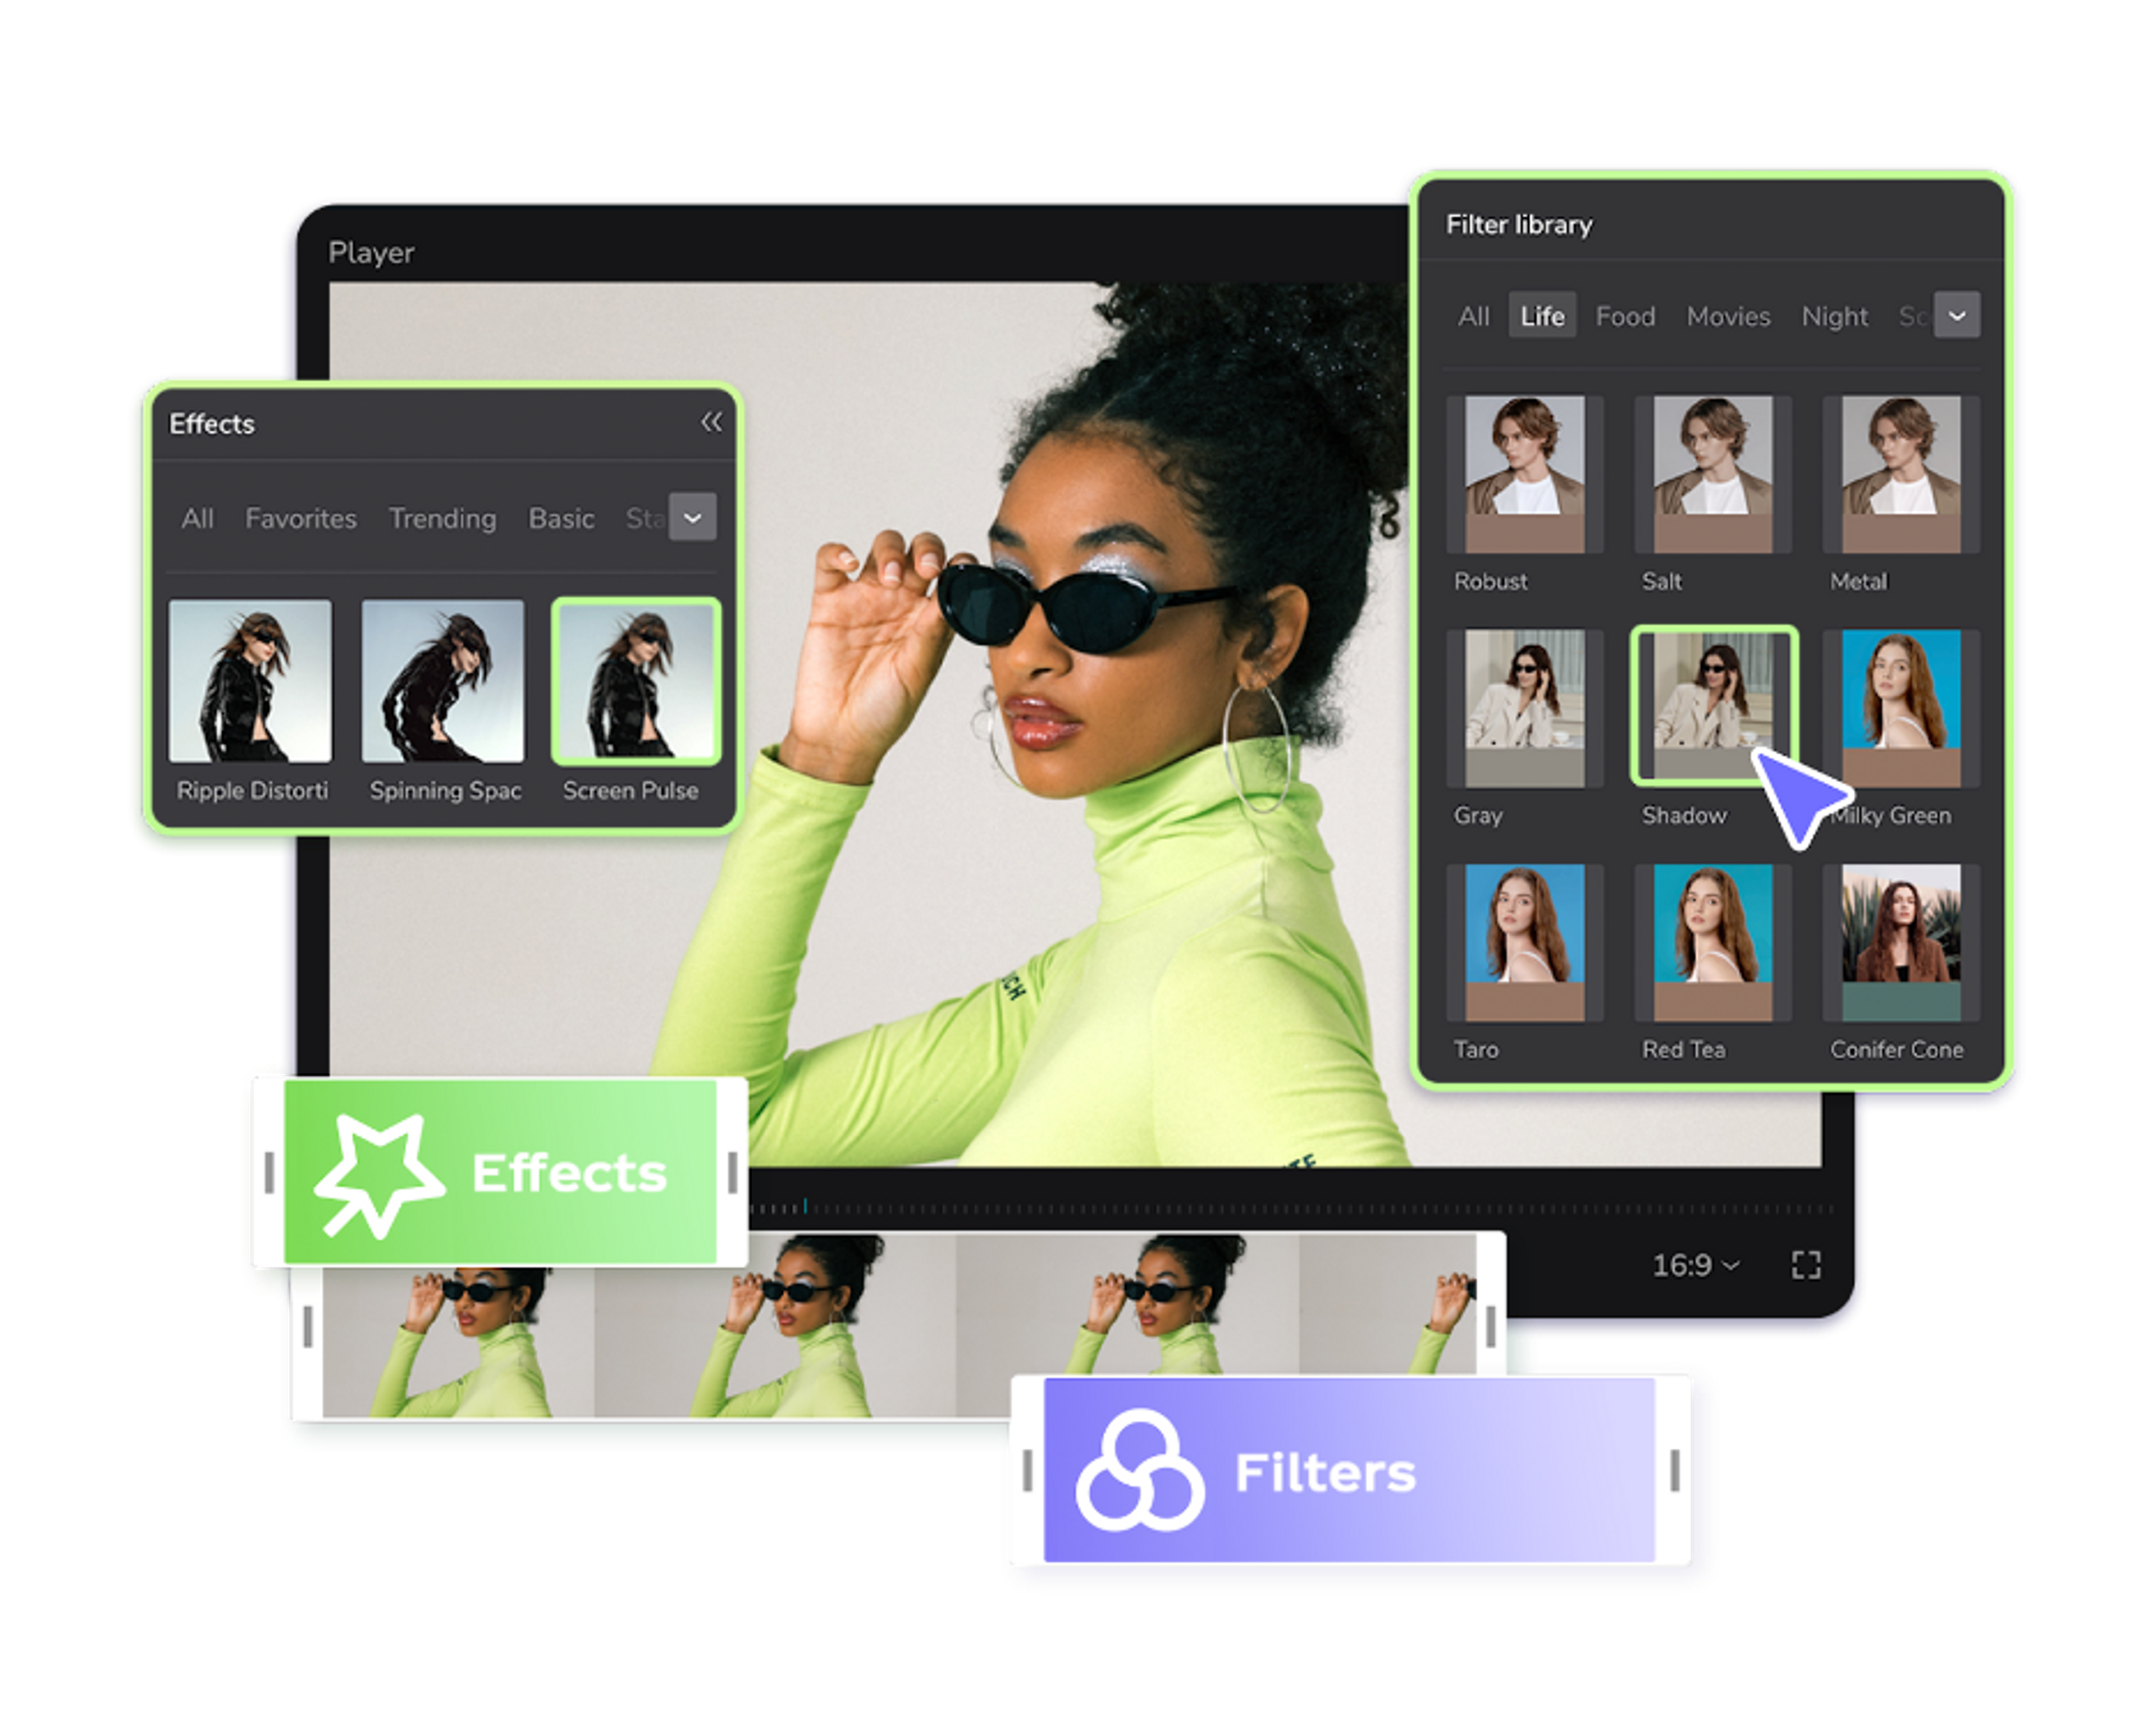
Step 8: Apply Filters and Enhancements
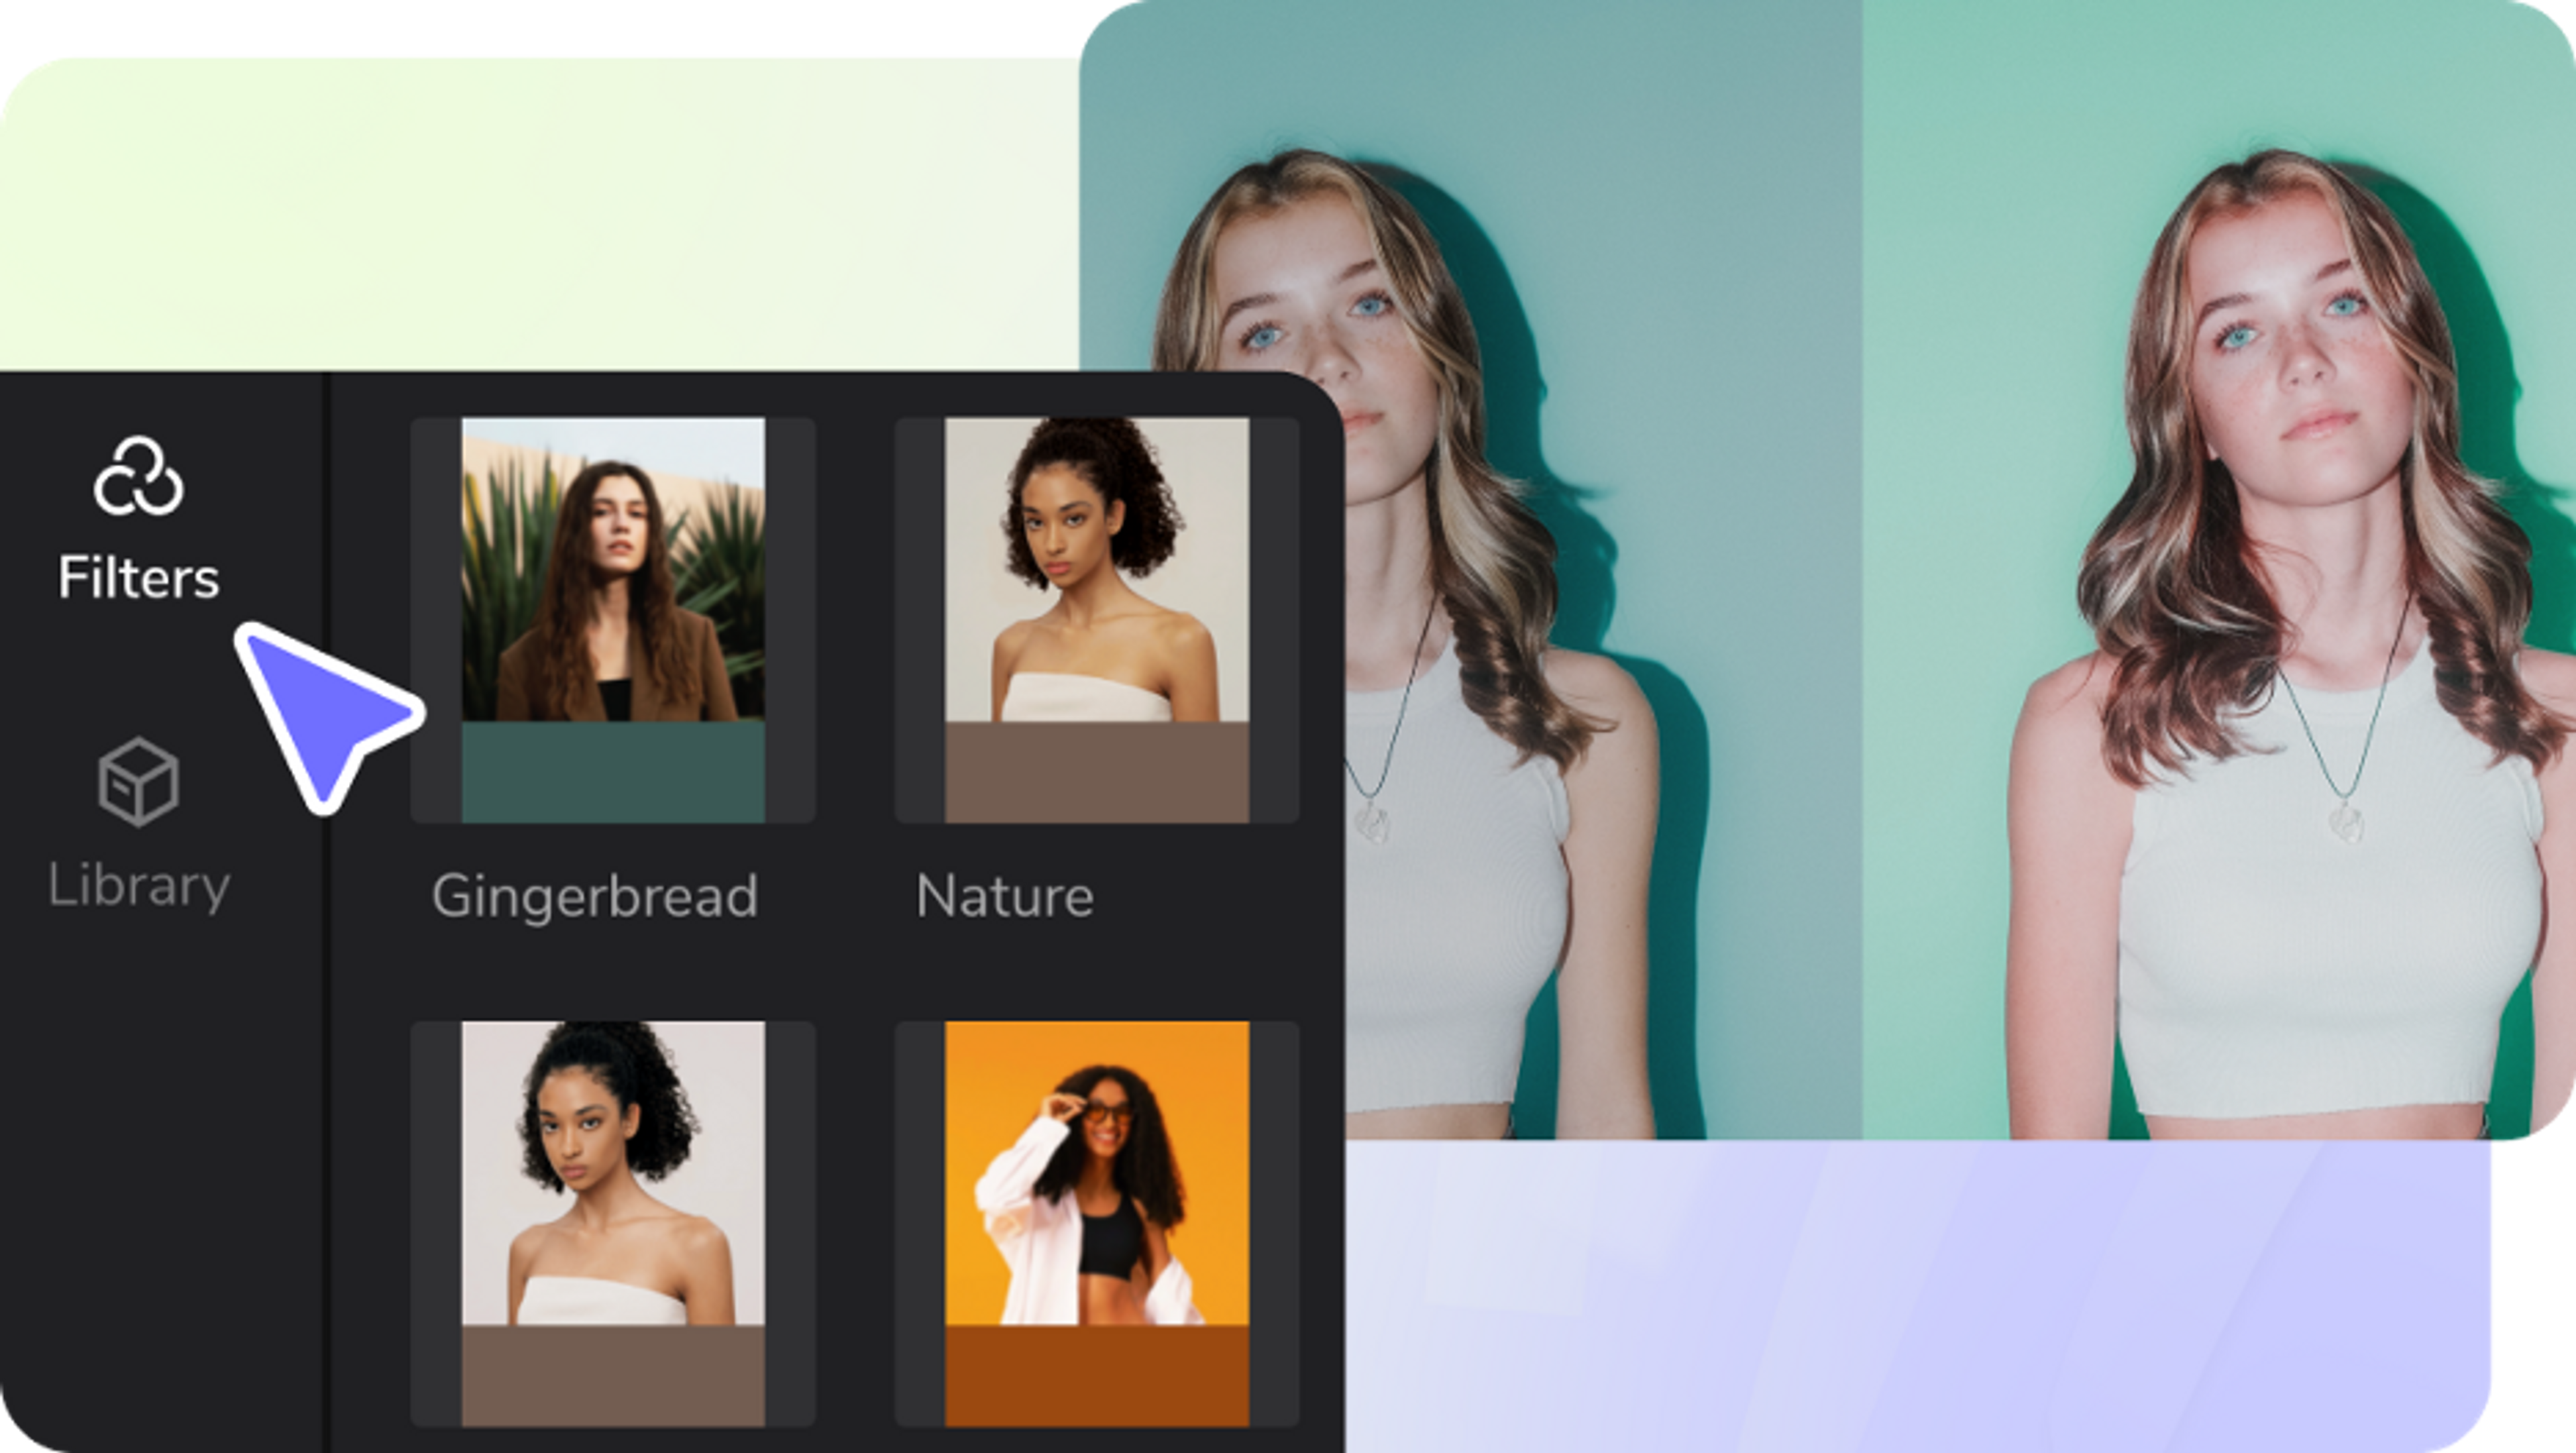
CapCut allows you to enhance the visual quality of your testimonial video. Tap on the “Filters” button to choose from various filters and color adjustments. Apply filters that align with your branding or create a specific atmosphere for your video. Adjust brightness, contrast, saturation, and other settings to ensure a consistent and appealing look throughout.
Step 9: Add Background Music or Voiceover
Add background music or a voiceover to create a more engaging and emotional testimonial video. CapCut enables you to import audio files or record your voiceover directly within the app.
Choose music that complements the mood of the testimonials and adjust the volume levels to ensure a balanced audio mix. Also, you can erase a background that doesn’t please you by utilizing a video background removing feature.
Step 10: Add Lower Thirds and Titles
Consider adding lower thirds and titles to your testimonial video to provide additional context and information. Lower thirds are text overlays that appear at the bottom of the screen, typically used to introduce the speaker or highlight key points. Click the “Text” button and choose a lower third template or create your own. Customize the text and appearance to match your branding.
Step 11: Incorporate B-Roll Footage
To make your testimonial video more visually engaging, intersperse it with relevant B-roll footage. B-roll refers to additional footage that complements the testimonials and helps illustrate the points being made. Add B-roll footage to CapCut alongside the testimonial clips to the timeline. Ensure that the B-roll enhances the narrative and doesn’t distract from the main testimonials.
Step 12: Apply Visual Effects and Filters
CapCut offers a range of visual effects and filters that can add creativity and polish to your testimonial video. Experiment with effects like slow motion, time-lapse, or color grading to enhance certain moments or evoke specific emotions. Use filters to create a consistent look or convey a particular aesthetic. Play around with different options to find the effects that best suit your video’s message and style.
Step 13: Include Call-to-Action (CTA)
As a business, guiding viewers toward the next step after watching your testimonial video is essential. Include a call-to-action (CTA) to encourage viewers to take action, such as visiting your website, subscribing to your newsletter, or contacting you for more information. Create a text overlay with a clear and compelling CTA and position it strategically within your video.
Step 14: Add Branding Elements
Incorporate branding elements into your testimonial video to reinforce your brand identity and maintain consistency. This includes your company logo, color palette, or specific brand graphics. Place the logo in the corner of the video or include it in the opening and closing frames. Use colors and graphics that align with your brand’s visual identity.
Step 15: Review and Export
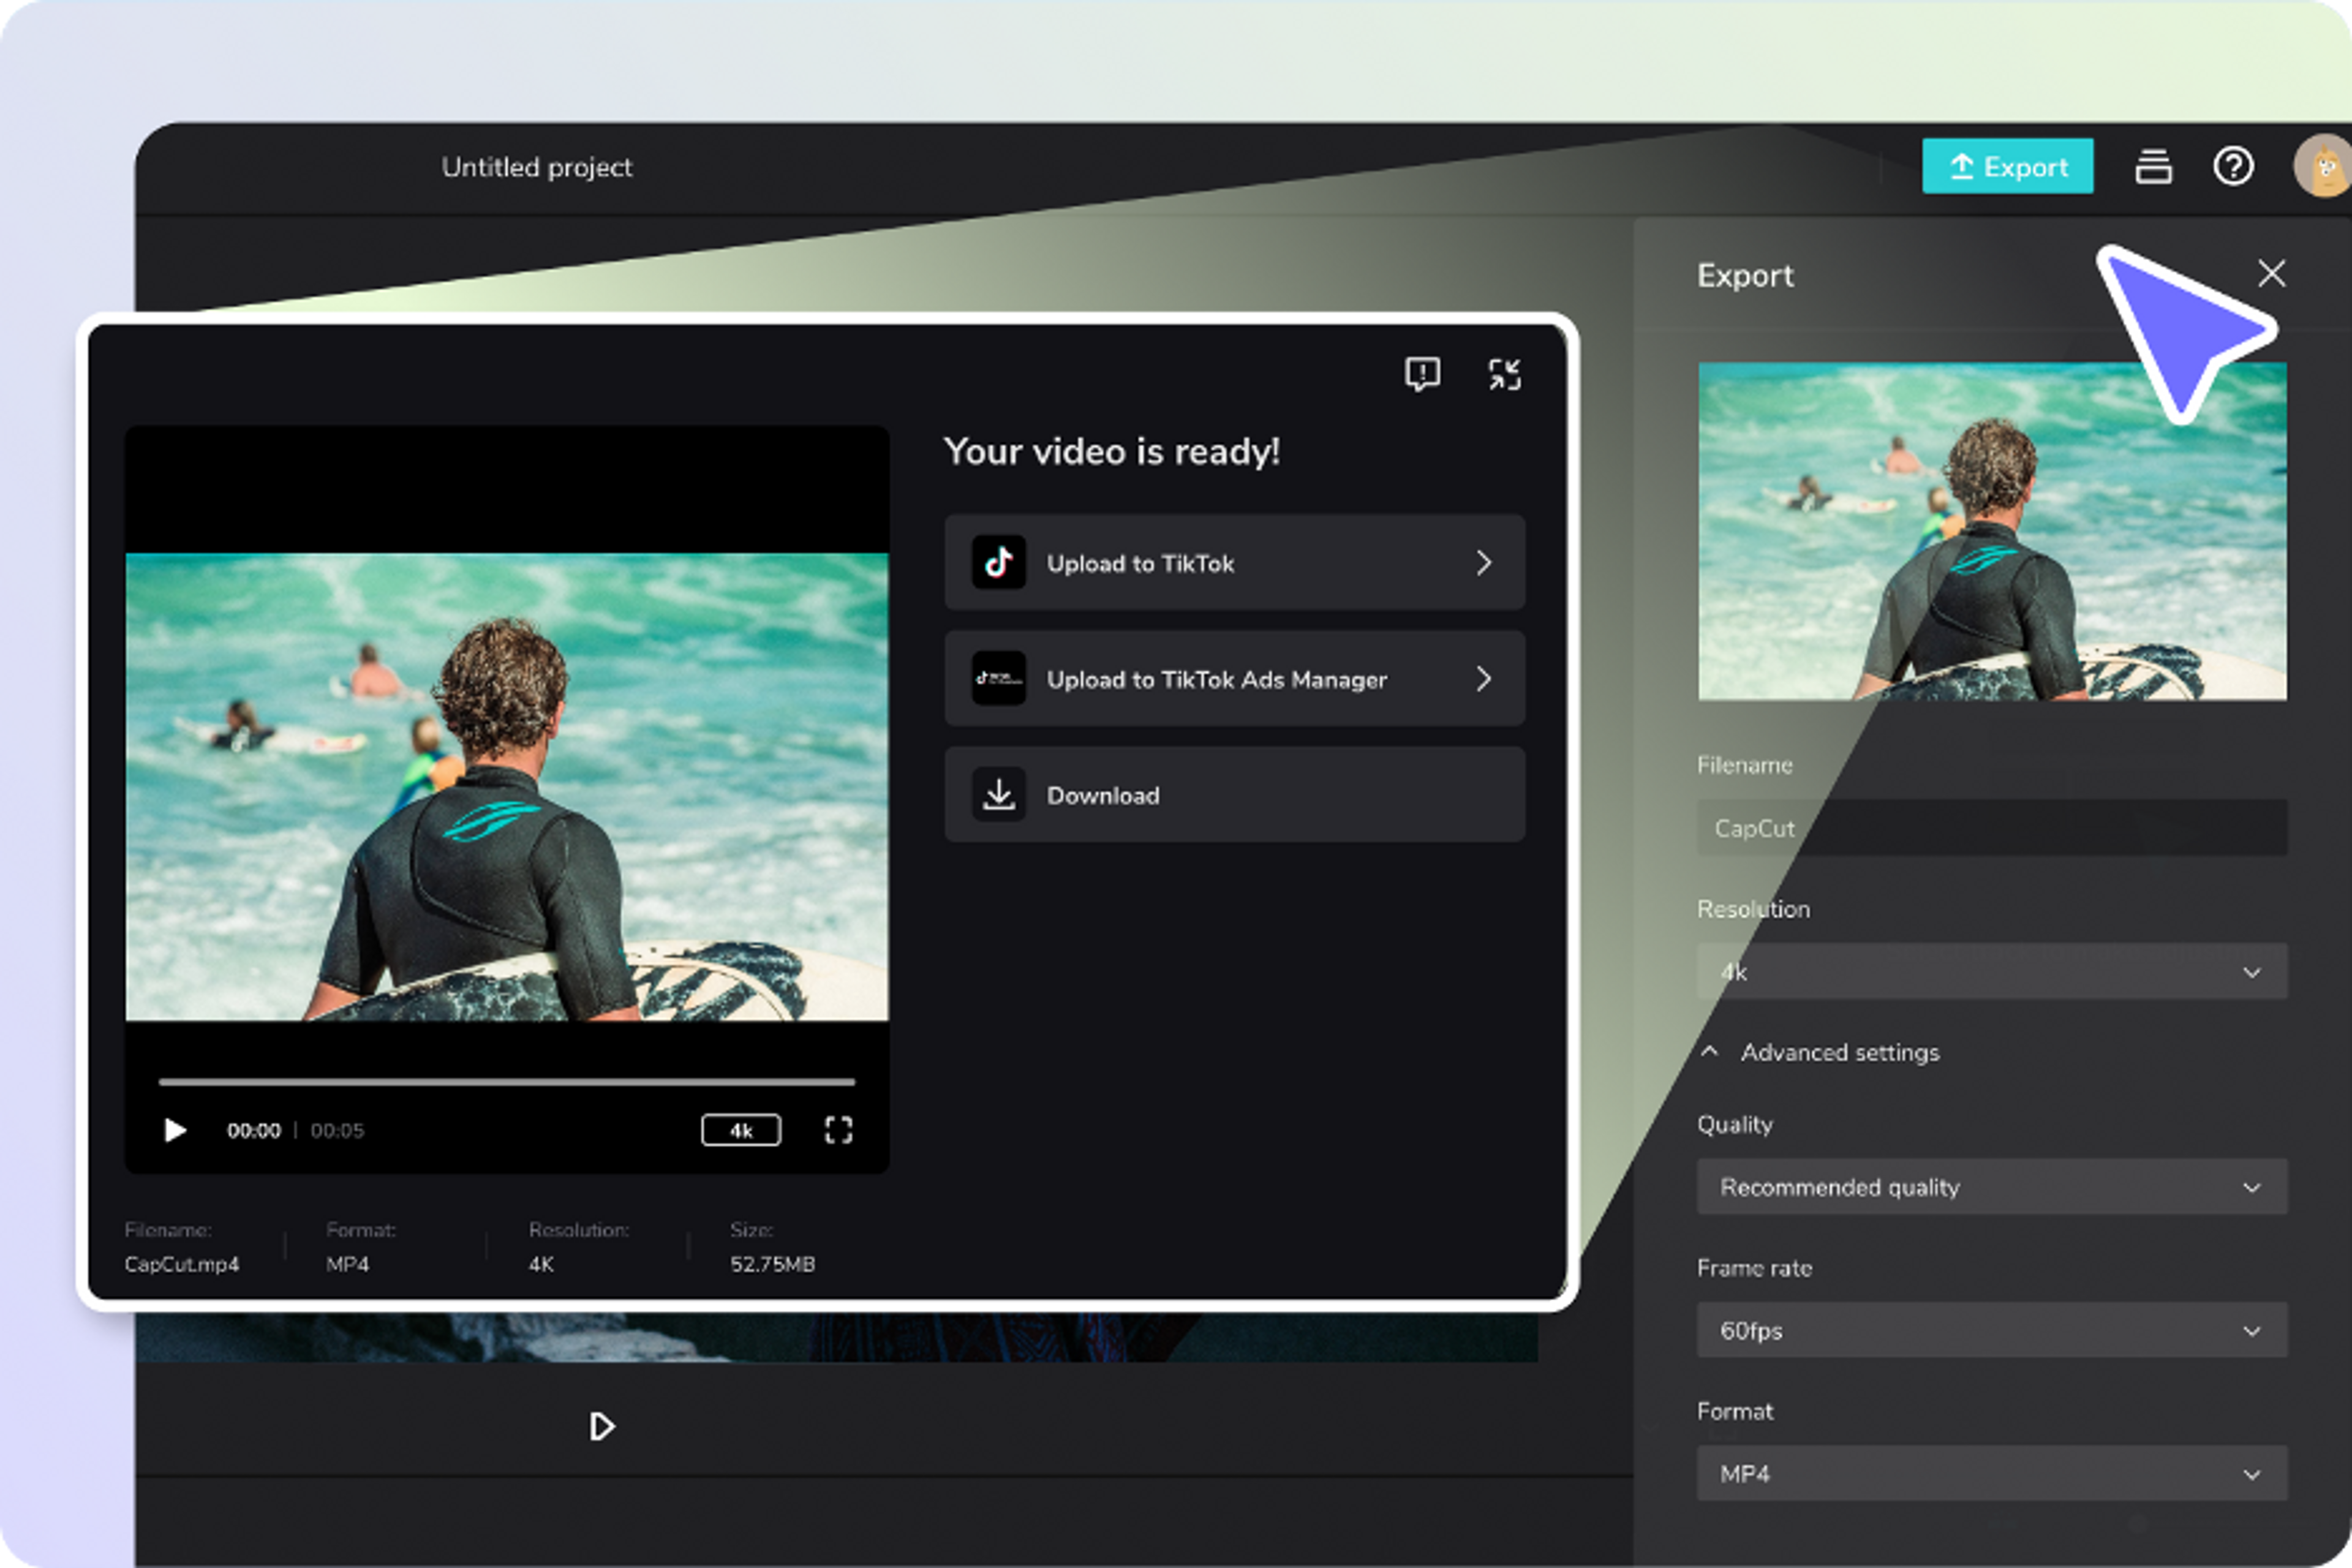
Once you are satisfied with your testimonial video, preview it to check for any necessary adjustments or final touches. Play it from start to finish to ensure a seamless flow. If everything looks good, tap on the “Export” button to save and render your video. CapCut offers various export options, including resolution and file format settings. Select the appropriate settings based on your intended use.
Conclusion
Creating compelling testimonial videos using CapCut is a straightforward and effective way to showcase positive feedback and build credibility for your business. Following this step-by-step guide, you can create professional-looking testimonial videos that captivate your audience and highlight your business’s value.

Comments are closed.